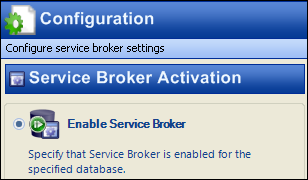
To enable the instance using Service Broker Assistant, right-click 'Service Broker' in the object explorer. Select 'Configure Service Broker...'. The configuration window will open and you will see 'Enable Service Broker' as the first option under the 'Service Broker Activation' section.

If 'Enable' is not selected, select it and click 'OK'. That's it. Service Broker is now enabled for that database.
Note: If the database has been restored from a file, there is the possibility that it will try to use the same Service Broker instance GUID. You will get an error message similar to the following:
The Service Broker in database [DB_NAME] cannot be enabled because there is already an enabled Service Broker with the same ID.
If this happens, choose the 'Reset Service Broker' option to obtain a new GUID, then try again to enable the Service Broker.


No comments:
Post a Comment